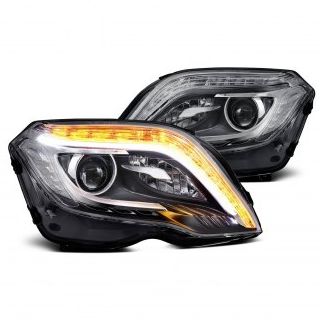
When a car headlight goes out, driving at night can quickly become stressful. It is unsafe and a common auto issue. Mechanics can replace the bulb, but they often charge a lot for a job that only takes a few minutes. The good news is that replacing your car headlights is one of the most manageable DIY car maintenance tasks.
Follow the easy 5-step guide to do it yourself, so you can save money and get back on the road safely and fast by replacing your car headlights correctly.
Before You Start: Tools, Safety & Prep
Before you begin, make sure you have the correct replacement bulb and the tools you will need.
Find the Right Bulb
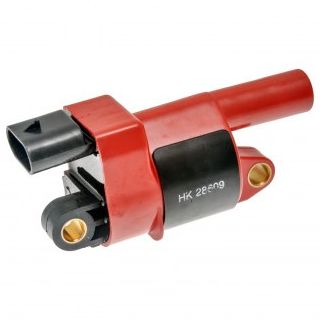
Three main types of bulbs: Halogen (the most common and easiest to replace), HID/Xenon, and LED. Most quick DIY jobs use halogen bulbs.
Necessary: Check your owner’s manual or use an online parts lookup tool to find the exact headlight bulb size your car needs, like H7, 9003, or H11. Always use the correct bulb.
Tip: It’s a good idea to replace both bulbs at the same time. If one has burned out, the other is probably not far behind.
Tools and Safety
New Bulb(s): Handle the new bulb only by its base or plastic housing.
Work Gloves (or Nitrile Gloves): Oils from your fingers can get on the halogen bulb’s glass, creating hot spots and making the bulb burn out faster.
Screwdriver or Socket Set: You will need one of these if you have to remove a plastic cover, the air intake, or the battery to reach the headlight.
Safety Glasses: These are strongly recommended.
Safety: Turn off your car, take the key, and let the engine cool down before you touch anything under the hood.
Guide: How to Replace Your Car Headlights in 5 Simple Steps
This simple guide breaks down how to replace your car headlights in just 5 easy steps. With minimal tools and about 15 minutes, you can safely and cheaply restore complete visibility to your vehicle.


Step 1: Access the Headlight Housing
The first step is to reach the back of the headlight.
Open the Hood: Pop the hood and locate the back of the headlight assembly.
Clear Obstacles (If needed): Depending on your car, the battery, air filter box, or coolant reservoir might block the headlight housing. If something is in the way, carefully move or remove it with basic tools.
Locate the Cap: The bulb socket is covered by a rubber boot or a plastic cap, sometimes held in place with small screws.
Action: Carefully remove the protective cover to expose the car bulb’s electrical connector.
Step 2: Disconnect the Wiring Harness
The wiring harness supplies power to the bulb and is connected directly to its base.
Locate the Connector: Find the plastic plug attached to the back of the bulb.
Release the Clip: Most harnesses are secured by a plastic tab or clip. You will typically need to press down on the tab with your thumb while gently pulling the connector straight back.
Action: Disconnect the electrical plug from the bulb. Do not pull on the wires themselves, as this can damage the harness.
Step 3: Remove the Old Bulb

The bulb is held in place by a clip or other mechanism. Be gentle; if you break the clips or tabs, you might have to replace the whole headlight assembly.
Identify Retention: The bulb is usually held in one of three ways:
- Metal Spring Clip: Squeeze the two ends of the clip inward and unhook it from its housing.
- Twist Lock (Bayonet Style): The bulb socket twists into the housing. Turn the base counter-clockwise (usually a quarter turn) until it releases.
- Small Screws: Very few modern vehicles still use this, but check for tiny screws holding the base in place.
Removal: Once it’s unlocked, gently pull the old headlight bulb straight out of the housing.
Step 4: Install the New Car Headlight Bulb
This step is essential to ensuring your new bulb lasts.
Wear Gloves: Make sure you wear gloves so you don’t touch the new bulb’s glass.
- Insert and Align: The new bulb has tabs on its base to help you line it up correctly.
- Action: Carefully line up these tabs with the grooves in the headlight housing. Push the bulb straight into the socket.
Secure the Bulb: Find out how to secure your car headlights.
- Action: Secure the new bulb by reversing the action you took in Step 3 (re-engage the spring clip or twist the socket clockwise until it locks firmly into place).
Reconnect the Wiring:
- Action: Push the wiring harness connector back onto the new bulb’s base until you hear a definitive click.
Step 5: Test and Seal
You are almost done. Now it’s time for the final checks.
Check Function: Turn your car on and test the new headlight at both low and high beam settings.
Action: If it doesn’t light up, ensure the wiring harness is fully seated and the bulb is locked correctly.
Replace the Cap: Turn your car.
Action: Reinstall the rubber boot or plastic cover/cap you removed in Step 1. This seal is crucial to prevent moisture from entering the housing, which can cause corrosion or shatter a hot halogen bulb.
Reassemble: Put back any parts you removed, like the air box or battery hold-down.
Congratulations! You have replaced your car’s headlight bulb, improved your visibility, and saved money on a mechanic.
Replace Your Car Headlights & Be Back on the Road, Safely!
Replacing your car headlights might seem intimidating, but it’s easy if you have the correct bulb and follow these five steps. You can do the job quickly and with confidence. Just remember: don’t touch the glass.
Bonus: After replacing your car headlights, take a moment to ensure they are properly aimed, as misaligned headlights can impair visibility and safety. Also, keep an eye on the headlight housings for any signs of condensation, which might indicate a need for additional sealing to prevent moisture damage.